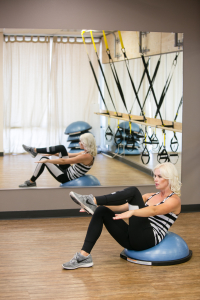
Welcome to week 1 of my three part series of Bosu Ball exercises!
I decided for the new year, we need to spice things up at the gym. I know A LOT of you steer clear of the bosu but it’s actually a fantastic workout tool for getting you into tip top shape and FAST!
And not to worry, every decent gym should have a few of these bad boys lying around so you needn’t purchase one. Unless that is, you are loving the workout, and then I say get one for your house stat!
Just stick to the technique, rest when you need to, NEVER EVER let your knees pass your toes and HAVE FUN.
Expect a new routine each week in January designed by, yours truly. 🙂
Oh- and be prepared to sweat. The bosu works as the perfect cleanse sometimes :).
Drum roll please…
WARNING!: Bosu workouts are never easy but soooo rewarding afterwards. If you’re up for a challenge, this cardio workout could be exactly what you need.
We all have crazy-busy schedules this dane age don’t we? Fitting in an hour of cardio followed by some weights and pilates 5 days a week can be quite overwhelming if you ask me. And BORING. Seriously, I can only run on the treadmill for so long before I feel like a hamster spinning in his wheel, you know what I mean?
Bosu balls provide a creative, challenging workout that give us not only cardio and strength training, but also balance and core work. Have you ever stood on a bosu ball? Find one at your gym or on amazon.com. TRY IT. I guarantee you’ll have to do some major engagement of those abs and leg muscles to keep from shaking and falling off the ball.
The best thing about a bosu workout? 20-30 minutes of cardio TOPS, is all you need. Follow with some light weights and high reps, abs and stretching, and you’re golden!
And you’ve all heard about the major calorie burn interval training gives us, RIGHT? 🙂
OKAY, so let’s begin our bosu ball-interval training session with tight abs, toned back muscles, glutes squeezing and an awareness of our inner thigh and pelvic floor (kegel) muscles as we begin! Please clear all exercise with your doctor and make sure you don’t have any knee injuries before starting a bosu session.
My kick a** plan is the following!:
1 MINUTE RUNNING:
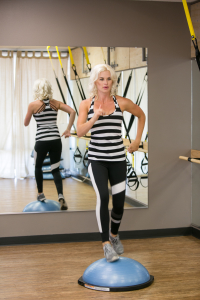
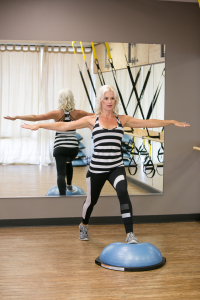
Facing the bosu with the right foot leading, up and down the bosu, soft knees, arms pumping.
1 MINUTE JUMPING:
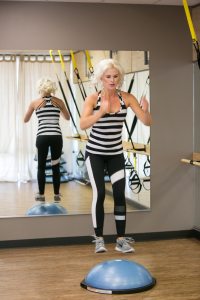
Both legs jumping and landing on the bosu, then jumping and landing on the ground, soft knees, super engaged arms and glutes.
1 MINUTE LATERAL SIDE JUMPS:
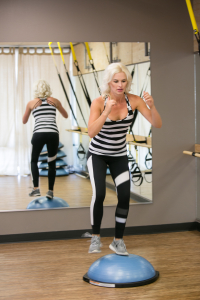
Start on the right side of the bosu and jump onto the bosu with your left foot followed by your right and land on the floor on the other side of the bosu. Quickly change directions and continue the same sequence side to side.
1 MINUTE FORWARD LUNGES:
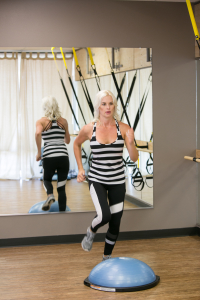
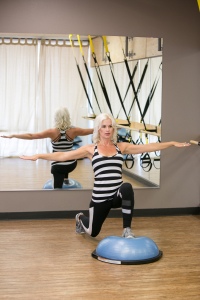
Facing your bosu, place your right foot onto the center of the bosu and find your balance. Lunge into the back knee to create a 90 degree angle from your knee to the floor and hip to knee as seen in picture 2 here. NEVER ALLOW YOUR FRONT KNEE TO PASS YOUR TOES… a knee injury can result. Stay safe and keep your front knee behind your toes at all times!
***REPEAT THE ENTIRE SEQUENCE STARTING ON YOUR LEFT FOOT THIS TIME (8 minutes total).***
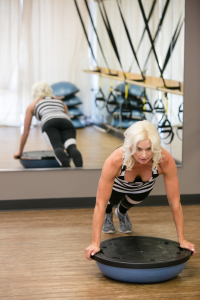
1 MINUTE PLANK HOLD
Watch that your shoulders are over your wrists. Squeeze your glutes, tuck your tailbone and drop your lateral (back muscles) down toward your hips. Keep your abs pulling in to your belly button for maximal abdominal usage.
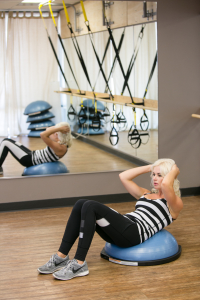
1 MINUTE ABDOMINAL CRUNCHES SEATED ON BOSU
Head supported in your hands, sit a few inches from the black base of the bosu. Feet hip width apart, knees hip width apart. Round your back as you lower your upper body and stay round as you crunch to lift. Keep those abs engaged and rib heads pressing down towards your hips (this will protect your back as you round back towards the floor).
1 MINUTE OBLIQUE LEG LIFTS SEATED ON THE BOSU
Keep your position from the previous abdominal sequence only extend your arms in front of you this time. Begin by lifting your right knee and bringing it toward your nose. As you round your spine and lean back, set the foot back onto the ground prepping for the other leg (it’s really just alternating legs each time you crunch upward). Remember to keep those abdominals squeezing inward super tight as you lean back for maximum protection of your back and ultimate abdominal usage!
This entire routine totals 11 minutes. So let’s run through the entire series THREE TIMES for a total of 33 MINUTES! If you’re feeling great, add a fourth run through!
I recommend ending with some standing free weights, 3 sets of 12-15 reps each exercise with light dumbbells. Always stretch your shoulders, back and hamstrings. A forward fold should be like flossing your teeth- never miss out on it!
Any questions or feedback guys? Try mixing this series into your weekly workout routine 2-3 times a week for 3-4 weeks and let me know what changes you feel and see with your bodies!
xx Shanna

